
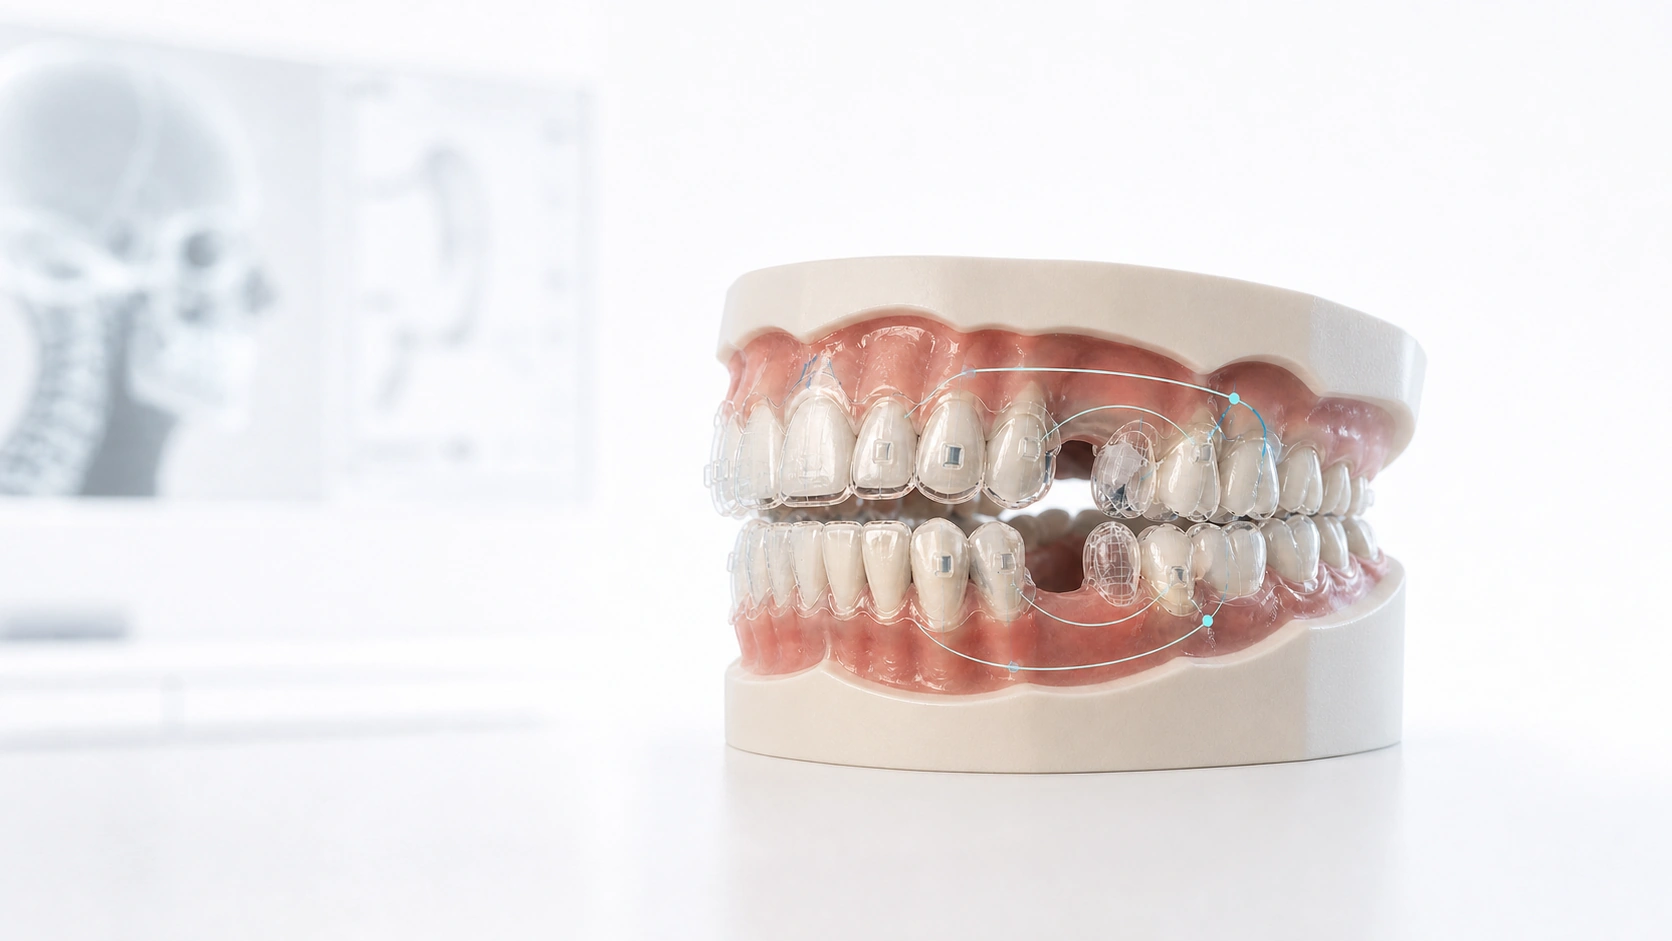
Why Extraction Cases Test Every Weakness in an Aligner Plan
Most malocclusions forgive an imperfect setup. Extraction cases do not. The moment you create a several-millimetre gap in the middle of an arch and ask the teeth on either side to move bodily into it, you remove every hiding place a weak plan has. If the setup expresses tipping instead of translation, the crowns lean into the space, the roots converge beneath it, the space reopens, and the occlusion buckles around the site. This is why extraction is the case type that separates confident aligner planning from optimistic aligner planning.
The underlying problem is biomechanical. An aligner delivers force to the crown, and unless that force is deliberately paired with a counteracting moment, the tooth tips around its centre of resistance rather than moving as a unit. Tipping is easy for an aligner; bodily movement, torque and vertical control all have to be engineered. Our guide to tooth movement biomechanics in clear aligner treatment covers why that distinction exists, and it is the single most important idea to carry into any extraction case: closing a gap is not the goal, closing it with parallel roots and a maintained occlusal plane is.
None of this means aligners cannot do extraction work. Modern attachment design, torque prescription and skeletal anchorage have made extraction closure genuinely predictable in experienced hands. It means the planning discipline has to be higher, the staging slower, and the decision to extract more rigorously justified, because an extraction case that goes wrong is far harder to recover than a non-extraction one.
The Extraction Decision: When Space Genuinely Requires It
Extraction is a space decision, and the discipline is to reach it only after the non-extraction routes to space have been measured and found insufficient. There are three legitimate reasons to extract: to relieve crowding that cannot be resolved otherwise, to retract a protrusive dentition, and to camouflage a skeletal discrepancy by repositioning teeth relative to the jaws. Every extraction plan should be traceable to one of those three.
Start With a Space Analysis, Not an Instinct
Quantify the crowding in millimetres per arch before deciding anything. The arch has three sources of space that do not require extraction: interproximal reduction, transverse expansion, and controlled proclination of the incisors. Only when the deficit exceeds what those can safely supply does extraction enter the conversation. As a broad working frame, mild crowding is often resolved with IPR and expansion alone, moderate crowding sits in the borderline zone where profile and incisor position decide the call, and severe crowding frequently commits the case to extraction.
| Arch-Length Deficit | Typical Route | Deciding Factors |
|---|---|---|
| Mild (approx. < 4 mm) | IPR ± expansion; non-extraction | Enamel thickness, arch form, gingival biotype |
| Moderate (approx. 4–8 mm) | Borderline — extraction vs non-extraction | Incisor inclination, lip support, profile, growth |
| Severe (approx. > 8 mm) | Extraction commonly required | Profile, anchorage demand, molar relationship |
These figures are orientation, not a rule. A 6 mm deficit in a patient with an already-protrusive profile and flared incisors points toward extraction; the same 6 mm in a retrusive, upright, thin-biotype arch points firmly away from it, because proclination would push the incisors off the bone. The millimetres start the conversation; the face and the incisor position finish it.
Read the Profile and the Incisors Before You Commit
The irreversible consequence of a first-premolar extraction plan is the profile change that comes with anterior retraction. In a bimaxillary-protrusive patient with lip incompetence, that retraction is the point of the treatment and improves the face. In a patient with an orthognathic or already-retrusive profile, the same retraction flattens the lips and ages the smile. Extraction decisions made from the models alone, without the facial photographs and the lateral cephalogram, are the ones that produce a technically closed case and an unhappy patient. Assess incisor inclination, interincisal angle, lip competence and the soft-tissue profile as a set, and treat the extraction question as a facial decision as much as a dental one.
- Measure the deficit per arch: Space analysis in millimetres before any extraction is considered.
- Exhaust non-extraction space first: IPR, expansion and safe proclination, quantified rather than assumed.
- Anchor the decision to a reason: Crowding relief, protrusion reduction, or skeletal camouflage — name it.
- Judge the profile deliberately: Retraction is irreversible; the face decides borderline cases.
- Check the Bolton relationship: A tooth-size discrepancy changes both the pattern and the finish.
- Confirm the records support it: Cephalogram and facial photographs, not models alone.
Choosing the Extraction Pattern — and Why It Rewrites the Mechanics
The pattern you extract is not a detail settled after the decision to extract; it defines the anchorage plan, the staging and the difficulty of the case. Two cases with identical crowding and different extraction patterns are different cases.
First Premolars
Removing the first premolars opens space adjacent to the canines and is the pattern for maximum anterior retraction. It suits severe crowding and dentoalveolar protrusion where the anterior segment genuinely needs to move back. The trade-off is anchorage: because most of the space is intended for retraction rather than for the posterior teeth to come forward, first-premolar cases carry the highest anchorage demand and the highest risk of the bowing effect if control is lost.
Second Premolars
Removing the second premolars places the space further back and is the pattern for moderate crowding where the profile should be preserved. Less of the space is used for anterior retraction, the anchorage demand is lower, and the posterior teeth are often intended to protract into part of the space. This is frequently the more comfortable extraction choice within an aligner workflow, precisely because it asks for less of the movement aligners find hardest.
Single Lower Incisor and Asymmetric Patterns
A single lower incisor extraction can resolve mild lower crowding with a Bolton tooth-size excess, but it carries specific risks: midline discrepancy, black triangles from the space distribution, and a residual overjet or overbite change if the arch coordination is not planned. Asymmetric patterns, such as a single upper first premolar for a Class II camouflage or a midline correction, are legitimate but demand asymmetric mechanics that the default setup will not produce on its own. Where a Class II relationship is driving the pattern, plan it alongside the sagittal mechanics covered in our guide to Class II correction with clear aligners.
| Pattern | Primary Indication | Anchorage Demand | Watch For |
|---|---|---|---|
| Four first premolars | Severe crowding, protrusion, max retraction | High | Bowing effect; profile flattening; anchorage loss |
| Four second premolars | Moderate crowding, profile preservation | Moderate | Posterior anchorage control during protraction |
| Upper first premolars only | Class II camouflage, large overjet | High (upper) | Molar relationship finish; asymmetric mechanics |
| Single lower incisor | Mild lower crowding, Bolton excess | Low | Midline, black triangles, overjet change |
Not Sure How to Stage Your Next Extraction Case?
Our treatment planning team builds extraction setups with the anchorage category defined, space-closure sequencing staged, and root-control attachments prescribed — ready for your review and approval.
[email protected]Anchorage: The Variable That Decides the Case
Anchorage is where extraction aligner cases are won or lost. Every force that closes a space acts equally on both sides of it, so the plan has to declare which teeth are meant to move and which are meant to hold. Classify the case at the diagnostic stage into one of three anchorage categories, because that classification determines the whole mechanical approach.
The Three Anchorage Categories
Maximum anchorage means almost all the space is used to retract the anterior segment, with no mesial drift of the posterior teeth permitted. This is the highest-difficulty category and the strongest indication for skeletal anchorage. Moderate anchorage allows the space to be shared between anterior retraction and posterior protraction, and can often be managed with attachment design, staging and elastics. Minimum anchorage means the posterior teeth are intended to come forward and close most of the space, which is the most forgiving scenario for an aligner because it asks for less of the difficult bodily retraction.
How Aligners Hold Anchorage
Aligners reinforce anchorage through several mechanisms working together. Attachments on the anchor teeth resist unwanted movement and keep the tray seated. Staging that moves a limited proportion of the arch at any one time preserves the rest as an anchor unit. Class II or Class III elastics recruit the opposing arch to support the anchorage. And when the demand genuinely exceeds what these can supply — almost always in maximum-anchorage first-premolar cases — temporary anchorage devices in the buccal shelf, infrazygomatic crest or palate provide the absolute anchorage that nothing else can. The interaction between attachment choice, IPR and staging that underpins all of this is set out in our guide to attachments, IPR and staging.
Staging Space Closure So It Actually Expresses
Space closure is the phase where the bowing effect lives, so staging is not a scheduling exercise, it is the mechanism that keeps the movement bodily. Get the sequence and the rate right and the roots stay parallel; get them wrong and you produce a closed crown-level render sitting on top of a collapsing occlusion.
The Bowing Effect, and Why It Happens
Left uncontrolled, an extraction closure produces a signature deformation. The anterior teeth tip lingually and extrude as they retract, deepening the overbite. The posterior teeth tip mesially into the space. The occlusal plane curves, and lateral open bites appear on either side of the extraction site. This is the roller-coaster or bowing effect, and it is not a compliance problem or a manufacturing problem — it is the default outcome of applying a retraction force to a crown without a counteracting root-control moment. Everything in the staging exists to prevent it.
Close Slowly, and Keep the Anchor Unit Still
Space closure should be staged conservatively, generally around 0.2 mm per aligner with extended wear on the active stages, because bodily movement against a maintained anchor is slow and rushing it converts translation into tipping. Keep the moving proportion of the arch small at any given moment so the anchor unit stays genuinely still. Some plans deliberately use a period of spontaneous drift before active closure to reduce the load, but even then the finishing movement into parallelism has to be actively controlled. The broader staging principles that keep any case tracking to its plan are covered in our guide on how to reduce clear aligner refinements, and the material behaviour that determines whether the tray holds its force between changes is covered in our comparison of multi-layer versus single-layer aligner sheets.
- Stage slowly: Around 0.2 mm per aligner with extended wear on active closure stages.
- Protect the vertical: Plan against anterior extrusion and deepening overbite from the start.
- Move a small proportion at once: Keep the anchor unit large enough to stay still.
- Control the finish into parallelism: The last millimetre of closure is where roots either align or converge.
- Build in overcorrection: Plan root angulation and closure past the target to allow for incomplete expression.
Attachments, Torque and Root Control
If staging sets the schedule of movement, attachments and torque prescription are what make that movement bodily. In an extraction case they are not optional refinements; they are the reason the closure expresses at all.
Root Control Is the Whole Game
The teeth bordering the extraction site need a mechanism that resists tipping and drives the root through the bone alongside the crown. Vertical rectangular attachments provide the couple that controls root angulation. Lingual root torque prescribed on the incisors counteracts the lingual crown tipping that produces the deep bite and the flattened profile. Mesial root-tip control on the posterior anchors stops them rolling into the space. None of these are automatic; each has to be specified against the movement it is solving, and every attachment in the file should have a stated job.
Attachments Also Keep the Tray Working
Beyond root control, attachments keep the aligner seated under the load of retraction and elastics. A tray that lifts in the anterior segment stops delivering the planned force exactly where control matters most, and the case quietly stops tracking while the render still looks correct. Retention attachments, elastic buttons and the root-control attachments are three separate specifications that happen to sit on overlapping teeth, and confusing them is a common planning error. For the full logic of how attachment geometry interacts with staging and interproximal reduction, our guide to attachments, IPR and staging is the reference, and the wider physics of why torque and translation need engineered assistance sits in our tooth movement biomechanics guide.
Beyond Extractions: The Other Complex Cases
Extractions are the most common complex case, but the same planning discipline — declare the movement, engineer the difficult part, and know the appliance's ceiling — applies to the other cases that stretch an aligner workflow. Each has a specific point at which it stops being an in-house aligner case.
Impacted and Ectopic Teeth
An impacted canine needs surgical exposure and sustained directional traction, and aligners cannot apply continuous force to a tooth that is not yet in the tray. The workable route is hybrid: fixed sectional mechanics or a bonded button and elastic chain to bring the tooth into the arch, then aligners to finish. A significant impaction, particularly a palatally displaced canine, is usually an orthodontic referral rather than a general-practice case.
Missing Teeth and Implant Site Preparation
Aligners are genuinely good at controlled space opening, which makes them well suited to creating and parallelising space for an implant or a prosthetic replacement. The discipline is root parallelism at the site — the adjacent roots must be upright and divergent enough to receive a fixture — and coordination with the restorative plan on the exact width required. This is one of the complex cases aligners often handle better than fixed appliances.
Periodontally Compromised and Reduced-Anchorage Cases
Reduced periodontal support means reduced anchorage and a lower force threshold. These cases can be treated, and the light, controlled, intermittent-appearing forces of a well-staged aligner plan can suit them, but they demand periodontal stability before and throughout treatment, lighter mechanics, and specialist oversight where the attachment loss is significant.
Ankylosis and True Skeletal Discrepancy
An ankylosed tooth will not move regardless of the setup, and planning movement it cannot deliver derails the whole arch; diagnose it before treatment, not in the second refinement. A true skeletal discrepancy beyond the range of dental camouflage is a surgical conversation, with aligners serving as the pre- and post-surgical alignment appliance rather than as the correction. Recognising these early is a clinical service; discovering them mid-treatment is not.
| Complex Case | Aligner Role | Referral Trigger |
|---|---|---|
| Impacted / ectopic canine | Finishing after traction (hybrid) | Palatal impaction; traction phase needed |
| Missing teeth / implant space | Controlled space opening & parallelism | Complex restorative coordination |
| Periodontally compromised | Light-force alignment with oversight | Significant attachment loss; active disease |
| Ankylosis | None for the ankylosed tooth | Confirmed ankylosis; surgical options |
| Skeletal discrepancy | Pre- and post-surgical alignment | Beyond camouflage range; profile-driven |
Several of these travel alongside the malocclusions covered elsewhere in this series — the vertical and transverse problems in our guides to deep bite correction, crossbite correction and overbite correction — and our overview of what can be treated with clear aligners sets the wider boundary of the appliance.
Building the Setup, Reviewing It, and Knowing When to Refer
A complex setup is a sequence of declared decisions, and reviewing it well is a clinical skill in its own right. The workflow below produces extraction and complex-case setups that are reviewable, defensible, and far more likely to express as designed.
- Declare the Extraction Reason and the Anchorage Category State why space is being created — crowding, protrusion or camouflage — and classify the case as minimum, moderate or maximum anchorage. Everything downstream, from TAD placement to staging, follows from these two declarations.
- Assign Every Auxiliary a Job Specify root-control attachments at the closure site, torque prescription on the anterior and posterior anchors, retention attachments, elastic configuration and any skeletal anchorage. Each auxiliary should exist to solve a stated movement problem over a defined stage range.
- Stage the Closure to Protect Root and Vertical Control Move a limited proportion of the arch at once, close at roughly 0.2 mm per aligner with extended wear on active stages, and plan against anterior extrusion and deepening overbite before it appears rather than after.
- Build In Overcorrection Plan root angulation and space closure past the target. Extraction closure is high-relapse and part of the planned movement will not fully express; the allowance for both belongs in the setup, not in a later refinement.
- Review the Setup Frame by Frame Check root parallelism at the closure site, watch for the bowing signature developing through the intermediate stages, confirm the occlusal plane stays flat, and verify solid posterior intercuspation at the final frame. The last frame always looks good; the middle frames are where the failures hide.
Setup quality is capped by scan and record quality, and extraction cases are unforgiving of a poor bite registration because the whole space analysis depends on how the arches relate in the model. Our reference on STL file requirements for treatment planning covers capture standards, and the review process itself is set out step by step in our checklist on how to read and approve a 3D setup.
The Referral Decision Is a Case-Selection Decision
Knowing when to refer is as much a clinical skill as knowing how to plan. Referral is not a failure; it is a decision made before treatment starts rather than a rescue attempted halfway through it. The practical triggers are consistent: maximum-anchorage extraction cases beyond your TAD experience, true skeletal discrepancies needing surgery, impacted or ectopic teeth requiring traction, significant anteroposterior correction, and periodontally or joint-compromised patients needing specialist oversight. If a case exceeds your anchorage control, your surgical support, or your experience with the specific movement, it is a referral. The distinction between what a general dentist and an orthodontic specialist are each best placed to treat is worth being honest about, and our guide on the difference between dentists and orthodontists frames that line.
Where these cases are submitted for planning support, standardising how the records and the treatment intent reach the planning team matters more than any single case decision. Our doctor portal for aligner case management covers how structured submission, 3D setup approval and case tracking reduce the back-and-forth that slows complex cases, our custom ortho treatment planning service outlines what a planning brief should contain, and the wider workflow context sits in our overview of digital treatment planning for clear aligners. Finally, extraction cases are high-relapse by nature, so plan retention at the setup stage using the protocols in our complete retainer guide after clear aligner treatment, and set the wear-time and elastic expectations early using our guide to patient compliance in clear aligner treatment.
Frequently Asked Questions
Can clear aligners close premolar extraction spaces?
Which teeth are usually extracted for clear aligner treatment?
Do extraction cases with clear aligners need TADs?
What is the bowing or roller-coaster effect in extraction aligner cases?
How long does extraction clear aligner treatment take?
Can clear aligners treat impacted canines?
When should a complex case be referred rather than treated with clear aligners?
Worldwide

Send Us Your Next Extraction or Complex Case
Upload the STL, cephalogram and photographs, tell us the extraction pattern and anchorage category, and receive a fully staged digital setup with space-closure sequencing, root-control attachments and anchorage design built in.
[email protected]