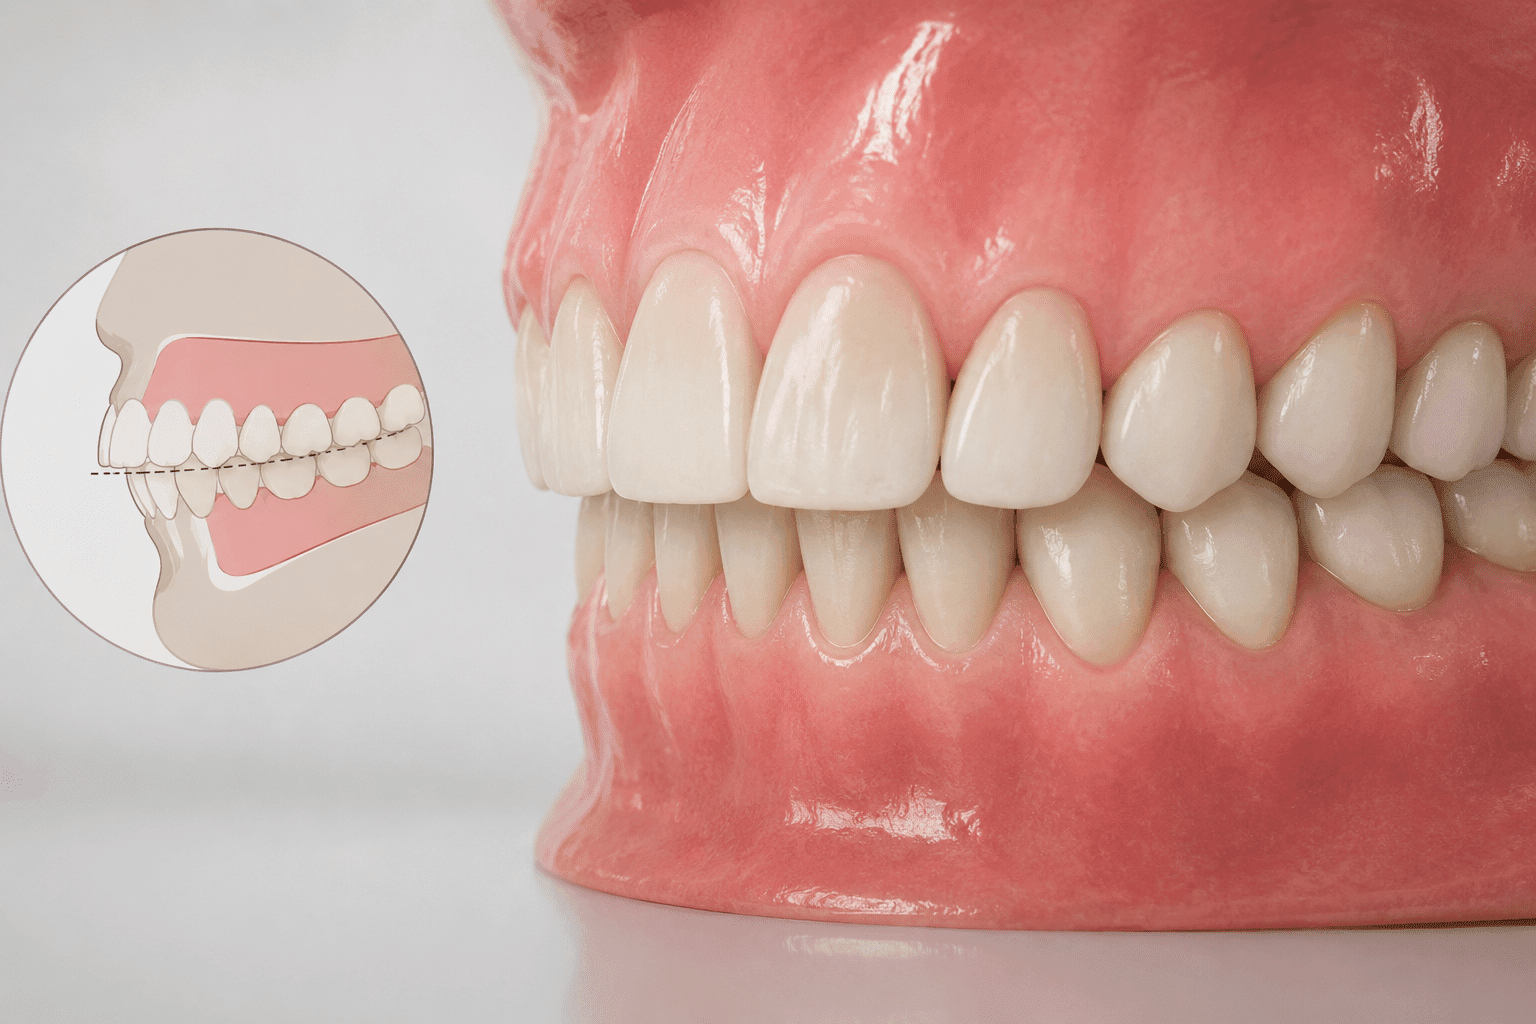
Diagnosing the Deep Bite Before You Plan It
Most disappointing deep bite outcomes are not mechanical failures. They are diagnostic ones. The setup was built to reduce a number on a chart rather than to correct a specific vertical problem in a specific face, and the case finished technically improved but clinically unsatisfying.
A normal overbite sees the maxillary incisors covering roughly 10 to 30 percent of the mandibular incisor crowns, usually somewhere around 2 mm. Coverage beyond about 30 percent is a deep bite. Beyond 50 to 60 percent it is severe, and once the lower incisal edges are contacting palatal soft tissue you are dealing with an impinging deep bite that carries genuine periodontal and restorative risk. Record the overbite in both millimetres and percentage, because the two tell you different things about a short-crowned patient versus a tall-crowned one.
Dental, Skeletal, or Both
This distinction sets the ceiling on what deep bite clear aligners can achieve. A dental deep bite is produced by tooth position: over-erupted incisors, an exaggerated curve of Spee, or posterior teeth that have lost vertical support through wear, extraction, or infraocclusion. These respond well to aligner mechanics. A skeletal deep bite is produced by facial form — a short lower facial height, a low mandibular plane angle, a strongly convergent growth pattern, and typically powerful elevator musculature. Aligners can camouflage the dental expression of a skeletal deep bite, but they cannot change the jaw relationship that produced it, and pretending otherwise is how cases end up in perpetual refinement.
Find the Actual Etiology
Deep bites arrive by four broad routes, and the route determines the mechanics you choose. Over-eruption of the maxillary incisors, over-eruption of the mandibular incisors, loss of posterior vertical dimension, and skeletal short-face pattern all present as “deep overbite” on the chart but require completely different setups. In practice you will frequently find two of them operating together, which is why an explicit written diagnosis beats a general impression.
The Records That Actually Change the Plan
Beyond a clean intraoral scan, the records that shift a deep bite plan are the ones describing the face and the function, not just the teeth. Curve of Spee depth measured from the deepest point to the occlusal plane. Incisal display at rest and on full smile. Lower facial height and mandibular plane angle. Wear facets, which tell you about parafunction. Periodontal status and crown-to-root ratio on the incisors you are proposing to intrude. Any history of TMD, clicking, or restricted opening.
Deep bite also travels in company. It commonly coexists with a Class II division 2 pattern, with anterior crowding, and with unilateral posterior discrepancies. If you are also managing a transverse problem, the sequencing interacts — our companion guide on crossbite correction with clear aligners covers how expansion mechanics and vertical control compete for the same anchorage.
The Four Mechanics of Bite Opening — and How to Choose
There are only four ways to reduce an overbite. Every deep bite plan you will ever build is some combination of them, weighted differently. The value of naming them explicitly is that it forces you to declare where your bite opening is coming from instead of letting the software decide by default.
1. True Incisor Intrusion
Moving the incisors apically along their long axes. This is the mechanically honest way to open a bite, it is the most aesthetically controllable, and it is also the hardest movement to express in an aligner. Vertical movements sit consistently at the low end of planned-versus-achieved accuracy in aligner research, which is why intrusion demands slower staging, deliberate anchorage, and overcorrection.
2. Posterior Extrusion
Allowing or driving the molars and premolars to erupt, rotating the mandible down and back and increasing lower facial height. With aligners this happens almost automatically, because the tray is a full-coverage bite block: roughly 0.5 to 0.75 mm of material per arch holds the posterior teeth apart from the moment the patient starts wearing it. That is a genuine advantage over fixed appliances. It is also a trap, because a great deal of what a setup labels as “intrusion” is delivered in the mouth as posterior eruption.
3. Incisor Proclination
Flaring the incisors labially reduces the vertical overlap without moving anything apically — often called relative intrusion. It is the cheapest bite opening available and the least stable. Unless the incisors are genuinely retroclined to begin with, as in a Class II division 2, proclination-driven bite opening should be treated as an unwanted side effect rather than a strategy.
4. Curve of Spee Leveling
Flattening an exaggerated curve of Spee combines the mechanics above across the lower arch. It is worth remembering that leveling consumes arch length — roughly a millimetre of space for each millimetre of curve flattened — so the leveling plan and the crowding plan have to be reconciled before staging, using IPR, expansion, or proclination as appropriate.
- Low-angle, short-face patient: Posterior extrusion is your friend. Increasing lower facial height improves both the bite and the profile. Lean on eruption and reserve intrusion for the aesthetic fine-tuning.
- High-angle patient with a deep bite: Uncommon, and unforgiving. Posterior extrusion will rotate the mandible open and worsen the profile. Correction must come from true intrusion, usually with skeletal anchorage.
- Excessive upper incisal display or gummy smile: Intrude the maxillary incisors. This is the case where anterior intrusion earns its complexity.
- Minimal upper incisal display or an aged smile: Do not touch the upper incisors vertically. Open the bite through mandibular intrusion and posterior eruption.
- Retroclined incisors in Class II division 2: Controlled proclination is legitimate here, because you are restoring normal inclination rather than borrowing bite opening you will later lose.
The reason these choices matter so much in aligner therapy is that the appliance expresses different movements with very different efficiency. Our guide to tooth movement biomechanics in clear aligner treatment goes deeper into why tipping and rotation express readily while intrusion, extrusion, and torque demand engineered assistance.
Bite Ramps: What They Do, Where to Place Them, When to Avoid Them
Bite ramps aligners use are raised features formed into the palatal surface of the maxillary anterior trays, typically around 2 mm in height. They are the single most useful auxiliary in deep bite work, and they are also routinely misused — added as a default, placed where the lower incisors never reach them, or left in the setup long after they have done their job.
The Three Jobs a Bite Ramp Does
First, disclusion. The moment the patient closes onto the ramps, the posterior teeth are held apart, which frees molars and premolars to erupt and begin opening the bite from the back. Second, anterior loading. Every time the patient bites, chews, or clenches, that force is channelled through the ramp into an intrusive vector on the upper anterior segment — effectively recruiting the patient's own musculature as your intrusion mechanism. Third, protection. Ramps prevent the lower arch from occluding onto posterior attachments and stop occlusal interferences from derailing Class II mechanics, elastics, or mandibular advancement features.
Placement Decisions
For most deep bites, ramps behind the maxillary central and lateral incisors are sufficient, because that is where the lower incisal edges contact on closure. Extending canine to canine is worth considering where the lateral incisors are short, peg-shaped, or significantly out of the arch, or where you want a broader, more distributed contact for a heavy-muscled patient. Where mandibular advancement is planned, angled or sloped ramps are used so the contact surface guides the mandible forward rather than simply propping it open.
The critical check is contact. Ramps only work if the lower incisors actually land on them. In a large-overjet Class II, the lower incisors may sit well behind the ramp surface and touch nothing, in which case the ramps contribute nothing until the overjet is reduced. Verify the contact relationship in the 3D setup at multiple stages, not just at stage one.
When Bite Ramps Are the Wrong Call
Skip or modify ramps when the maxillary anteriors carry palatal restorations, veneers, or composite that the ramp would load unpredictably. Reconsider them in patients with active TMD symptoms, significant joint loading pain, or heavy nocturnal parafunction, where concentrating all occlusal force onto six anterior teeth is not a neutral decision. Severe maxillary anterior crowding can make ramp geometry impractical until the arch is partly aligned, so staging ramps in from a later aligner is often better than forcing them at the start. And in an anterior crossbite or edge-to-edge relationship, the mechanics simply do not apply.
Not Sure How to Stage Your Next Deep Bite Case?
Our treatment planning team builds deep bite setups with defined intrusion targets, bite ramp geometry, anchorage design, and overcorrection built in — ready for your review and approval.
[email protected]Incisor Intrusion: Force, Anchorage, Torque and Staging
Intrusion is a low-force, high-precision movement. The classical figure for true incisor intrusion is roughly 10 to 20 grams per tooth, and that number is not arbitrary — it reflects the narrow apical periodontal ligament area over which the force is concentrated. Push harder and you do not intrude faster; you increase apical resorption risk and the tooth stops tracking.
Anchorage Is the Whole Problem
Newton applies. Any intrusive force on the anterior segment produces an equal and opposite extrusive force on whatever is resisting it, which in an aligner is the posterior segment. In a low-angle patient that reciprocal posterior extrusion is a bonus. In a high-angle patient it is the thing that ruins the case, and it has to be blocked with skeletal anchorage rather than accepted.
Practically, this means designing an anchorage unit rather than hoping for one. Vertical or horizontal rectangular attachments on the premolars and molars stiffen the posterior segment and improve its resistance. Canines are usually recruited into the anchorage unit rather than intruded alongside the incisors. Attachments on the incisors themselves are generally avoided during intrusion unless they are specifically needed for torque control, because a poorly oriented attachment on a tooth you are trying to intrude can introduce an extrusive or tipping component.
Sequential Versus Simultaneous Intrusion
Attempting to intrude all four incisors at once divides the available force across four teeth and often results in very little intrusion in any of them. Sequential intrusion — typically the centrals first, then the laterals, or the reverse depending on incisal edge levels — concentrates the force on fewer teeth and converts the untreated incisors into additional anchorage. It lengthens the case, and in moderate to severe deep bites it is usually worth it.
Torque Control Is Not Optional
Intruding an incisor without controlling its inclination produces labial crown tipping. The overbite reduces on the setup, the patient's incisors flare in the mouth, and the correction proves unstable the moment retention lapses. Lingual root torque needs to be planned alongside the intrusion — through pressure areas or power ridges, through appropriately shaped attachments, or by staging torque and intrusion in deliberate sequence. This is also where root position relative to the labial plate needs checking, particularly in thin-biotype patients.
Staging Rate
Intrusion should be staged more slowly than translation. Where a bodily movement might be staged at around 0.25 mm per aligner, intrusion is generally staged at 0.10 to 0.15 mm per aligner. Slower staging means more aligners and a longer case, but it also means the tooth keeps up with the tray. Aggressive vertical staging is one of the most common reasons a deep bite case arrives at refinement having achieved half of what the setup promised. Our guide on how to reduce clear aligner refinements covers the wider staging principles, and the detail on attachment design and sequencing is expanded in our article on attachments, IPR and staging.
- Light forces only: Around 10 to 20 g per incisor. More force does not mean faster intrusion, only more risk.
- Build the anchorage unit deliberately: Posterior attachments plus canines, with the reciprocal extrusion either welcomed or blocked based on facial pattern.
- Sequence in severe cases: Two teeth at a time expresses far better than four at once.
- Plan torque with the intrusion: Intrusion without lingual root torque flares incisors and destabilises the result.
- Stage at 0.10 to 0.15 mm per aligner: Vertical movement is slow. Setups that ignore this finish short.
- Cap the expectation: Around 2 mm of reliable true intrusion per arch without skeletal anchorage.
Building the Digital Setup: A Deep Bite Planning Workflow
A deep bite setup is a series of declared decisions, not a single instruction to reduce the overbite. Working through the following sequence before the plan is built produces setups that are reviewable, defensible, and far more likely to express as designed.
- Define the Vertical Target and the Overcorrection State the final overbite you want in millimetres, usually somewhere around 1.5 to 2 mm, and then state the overcorrection on top of it. Building in an extra 1 to 1.5 mm of bite opening is not padding; it is the allowance for the portion of planned vertical movement that will not express and for settling after treatment.
- Declare Where the Bite Opening Comes From Write down the split across maxillary intrusion, mandibular intrusion, posterior eruption, and any inclination change. If you cannot state the split, the software has decided it for you — usually by proclining incisors, which is the least stable route.
- Reconcile Curve of Spee Leveling with Arch Length Calculate the space demand of flattening the curve and decide how it will be funded — through IPR, through transverse development, or through accepted proclination. Doing this before staging prevents mid-treatment crowding surprises in the lower anterior segment.
- Assign Features to Jobs Specify bite ramp position, height, and the stages across which they remain active. Specify anchorage attachments by tooth. Specify torque prescriptions on the incisors being intruded. Specify elastics and any Class II mechanics. Every feature should exist to solve a stated problem.
- Stage and Sequence in the Right Order Bite opening is generally front-loaded, because posterior disclusion needs time to work and because most subsequent mechanics are easier once the anterior interference is gone. Class II correction, retraction, and detailing sequence after the vertical is under control rather than alongside it.
- Review the Setup Frame by Frame, Not Just Final Check ramp contact at multiple stages, check for collisions as the curve levels, check root position at the end of intrusion, and confirm posterior contacts re-establish by the final stage. The last frame always looks good; the intermediate frames are where the problems live.
Setup quality is limited by scan quality, and vertical cases are particularly sensitive to bite registration errors. If the occlusal record is imprecise, the overbite in your digital model is not the overbite in the patient's mouth. Our reference on STL file requirements for treatment planning covers scan capture and bite registration standards, and the review process itself is set out in our checklist on how to read and approve a 3D setup.
Case Limits, Auxiliaries, and Why Deep Bites Relapse
Knowing when clear aligners for deep overbite are the right appliance is as valuable as knowing how to plan them. Aligners handle dental deep bites capably. They handle skeletal ones only cosmetically.
Where Aligners Alone Fall Short
Cases requiring more than roughly 3 to 4 mm of genuine incisor intrusion sit beyond comfortable aligner range without auxiliary anchorage. High-angle patients in whom posterior extrusion must be actively prevented need skeletal anchorage, because the aligner has no way to resist the reciprocal force. Significant periodontal attachment loss changes the centre of resistance and the force tolerance of the teeth you intend to intrude. Ankylosed teeth will not move at all. And a deep bite driven by marked vertical maxillary excess or a severe skeletal discrepancy in a non-growing patient is an orthognathic conversation, not a staging problem.
Auxiliaries Worth Considering
Temporary anchorage devices allow absolute intrusion of the anterior segment without reciprocal posterior extrusion, and they are the standard answer for high-angle deep bites and for large intrusion demands. Sectional fixed mechanics can be combined with aligner therapy where a specific segment needs force levels the tray cannot deliver. Class II elastics and mandibular advancement features address the sagittal component that so often accompanies a deep bite, and their sequencing relative to bite opening should be explicit in the plan.
Why Deep Bites Come Back
Deep bite is one of the most relapse-prone corrections in orthodontics, for a simple reason: the forces that created it are usually still there at the end of treatment. Posterior teeth that were allowed to erupt can re-intrude under heavy occlusal load. Intruded incisors re-erupt. Proclined incisors upright. In a low-angle patient with strong elevator musculature or nocturnal parafunction, all three can happen at once.
The counters are planned rather than improvised. Overcorrection is built into the setup, not added later. Retention starts full time and transitions to long-term night wear rather than being tapered off. For patients with heavy closing forces, an anterior bite plane retainer maintains the posterior support that the correction depended on. Our complete retainer guide after clear aligner treatment covers the retention protocols in detail.
For clinicians building a broader vertical and transverse case library, our overviews on correcting overbite with clear aligners and digital treatment planning for clear aligners provide the patient-facing and workflow context that sits either side of this clinical detail.
Frequently Asked Questions
Can clear aligners correct a deep overbite?
What are bite ramps on clear aligners and how do they work?
How much overbite can clear aligners correct without TADs?
Do bite ramps cause a posterior open bite?
How long does deep bite correction with clear aligners take?
Should you intrude the upper or lower incisors in a deep bite case?
Why do deep bites relapse after clear aligner treatment?
Worldwide

Send Us Your Next Deep Bite Case
Upload the STL and photographs, tell us your vertical strategy, and receive a fully staged digital setup with bite ramp and intrusion planning built in.
[email protected]