Diagnosing Class II Before You Choose Your Mechanics
Class II is the most commonly attempted and most commonly disappointing correction in clear aligner therapy. The reason is rarely the appliance. It is that the plan was built to move a molar relationship from Class II to Class I on a screen, without ever declaring where those millimetres were going to come from in the patient's mouth.
A Class II molar relationship means the mesiobuccal cusp of the maxillary first molar occludes mesial to the buccal groove of the mandibular first molar. Half a cusp is roughly 2 to 3 mm; a full cusp is roughly 4 to 6 mm. Record the discrepancy separately on each side, because asymmetric Class II is common and needs asymmetric mechanics. Record the canine relationship as well, since molar and canine classification frequently disagree, and record the overjet in millimetres, because that number sets the practical ceiling on what elastics and distalization can deliver.
Dental, Skeletal, or Both
This is the distinction that determines whether you are correcting the malocclusion or camouflaging it. A dental Class II arises from tooth position: mesially drifted maxillary molars, often after early loss of a deciduous second molar, or a mandibular arch that has collapsed forward. These respond genuinely well to aligner mechanics. A skeletal Class II arises from jaw relationship, most often mandibular retrognathia rather than maxillary excess, and shows up as an increased ANB angle, a retruded pogonion, and a convex profile.
Aligners cannot change an adult jaw relationship. What they can do is move teeth relative to those jaws until the occlusion interdigitates, which improves the bite and, if planned carefully, the smile. What that camouflage does not do is fix the profile, and a patient who came in unhappy with a receding chin will still be unhappy with it at debond. Establishing whether the case is a correction or a camouflage, and saying so to the patient before treatment starts, prevents most Class II disappointment.
Division 1 Versus Division 2
The two divisions demand different setups. In Class II division 1 the maxillary incisors are proclined with a large overjet, and the anterior segment usually needs retraction and torque control. In Class II division 2 the maxillary central incisors are retroclined, the laterals are often flared, and there is almost always a deep overbite riding along with it. Division 2 cases have to be treated as vertical problems before they are treated as sagittal ones, because you cannot advance a mandible or run elastics effectively into a locked deep bite. Our companion guide on deep bite correction with clear aligners covers the bite ramp and intrusion mechanics that division 2 cases depend on.
Growth Status Changes Everything
In a growing patient, the mandible is still a moving target, and appliances that posture it forward can harvest genuine skeletal change. In a non-growing patient, the same appliance produces mostly dentoalveolar movement. Cervical vertebral maturation staging or a hand-wrist film is worth the effort here, because the difference between a patient at their pubertal growth peak and one two years past it is the difference between a functional correction and a dental compromise.
- Classify per side: Molar and canine relationship recorded separately left and right, in cusp widths and millimetres.
- Separate dental from skeletal: ANB, facial profile and pogonion position, not just the molar relationship.
- Identify the division: Division 2 is a vertical problem first and a sagittal problem second.
- Establish growth status: Determines whether mandibular advancement is a real option or a dental compromise.
- Measure the overjet: Sets the practical ceiling on elastics and distalization.
- Assess the lower incisors: Their inclination and the thickness of the labial plate cap how much reciprocal proclination you can accept.
The Four Routes to Class II Correction
Every Class II plan you will ever build is one of four strategies, or a deliberate combination of two. Naming the strategy explicitly before the setup is designed is what prevents the software from choosing for you, which it almost always does by proclining lower incisors.
1. Sequential Maxillary Distalization
Moving the maxillary molars and premolars distally to convert a Class II molar relationship into Class I. This is the primary aligner mechanic for mild to moderate dental Class II, and it is the one aligners genuinely do better than fixed appliances, because the tray can stage tooth movement one at a time in a way that wire mechanics cannot. It is anchorage-limited, which is the subject of a later section.
2. Mandibular Advancement or Growth Modification
Posturing the mandible forward with an integrated appliance feature to encourage condylar growth and forward dentoalveolar adaptation. This is the strategy for growing patients with a genuinely retrusive mandible, and it is where aligner therapy has expanded most in recent years through built-in advancement wings and precision wing features.
3. Extraction Camouflage
Typically maxillary first premolar extraction, using the space to retract the anterior segment into a Class I canine relationship while accepting a Class II molar finish. This is the appropriate strategy for adults with a moderate to severe skeletal Class II and significant overjet, where distalization would be pushed beyond what it can deliver. Aligner extraction mechanics demand rigorous anchorage design and slow staging, and they are unforgiving of a setup that plans translation but delivers tipping.
4. Orthognathic Surgery
For adults with a severe skeletal discrepancy, a marked profile concern, or an ANB well outside the range that camouflage can disguise. Aligners function as the pre-surgical and post-surgical alignment appliance rather than as the correction. Recognising this case early is a service to the patient; discovering it in the second refinement is not.
| Strategy | Best Candidate | Typical Range | Primary Limitation |
|---|---|---|---|
| Sequential distalization | Dental Class II, adequate arch length, non-crowded upper | 2–3 mm per side; up to 4 mm with TADs | Reciprocal anterior proclination; anchorage loss |
| Mandibular advancement | Growing patient, retrusive mandible, near growth peak | Full-cusp correction achievable | Limited skeletal effect in adults; adaptation period |
| Class II elastics | Adjunct to almost any Class II strategy | Supports 2–4 mm of sagittal change | Compliance dependent; extrusive side effects |
| Extraction camouflage | Adult, moderate–severe skeletal Class II, large overjet | Full-cusp and beyond | Demanding anchorage; profile change is irreversible |
| Orthognathic surgery | Severe skeletal discrepancy, profile-driven concern | Unlimited | Surgical morbidity, cost, patient acceptance |
The reason strategy selection matters so much in aligner therapy is that the appliance expresses different movements with very different efficiency. Distal bodily movement of a molar is one of the harder movements to deliver; tipping that same molar is easy, which is precisely why so many distalization cases finish with tipped crowns and unchanged roots. Our guide to tooth movement biomechanics in clear aligner treatment explains why translation, torque and vertical control require engineered assistance while tipping and rotation express readily.
Class II Elastics: Force, Vectors and the Side Effects You Must Plan For
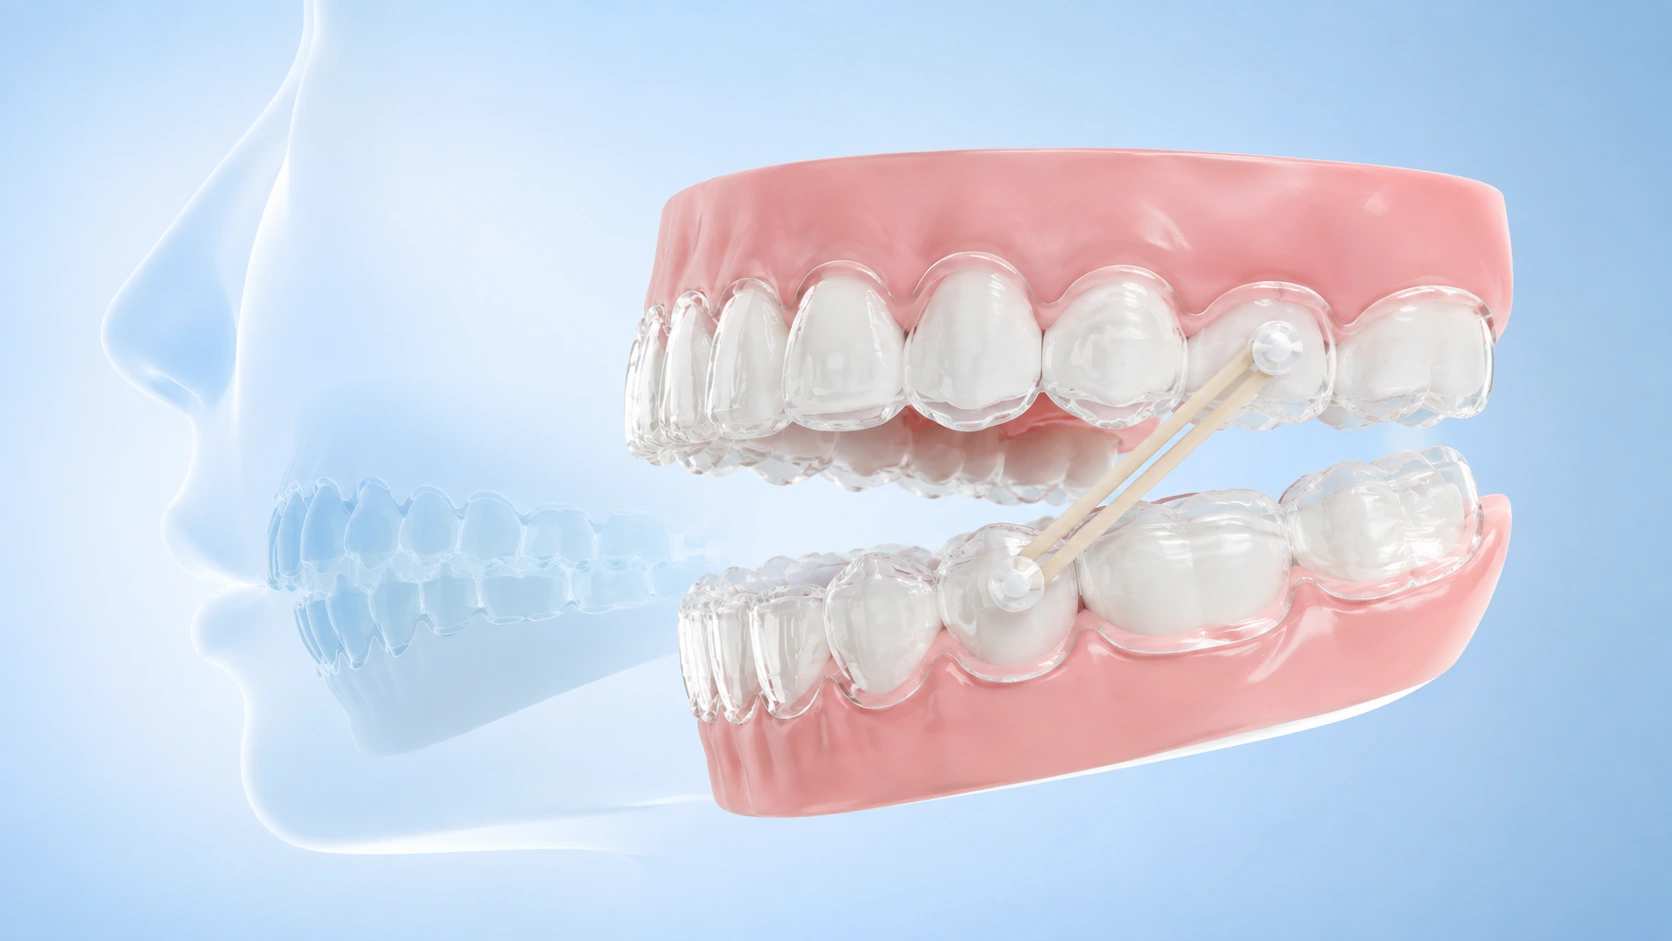
Class II elastics run from the maxillary canine forward to the mandibular first or second molar back, producing a distal force on the upper arch and a mesial force on the lower. They are the workhorse of Class II aligner correction and the single largest compliance variable in the case.
Force Levels and Duration
Class II elastics are typically prescribed in the 3.5 to 6 ounce range at the distance they will be worn, with lighter forces used when the elastic is supporting distalization and heavier forces when it is driving the correction. Wear is 20 to 22 hours a day, removed only for eating and cleaning, for as long as the sagittal correction is active. Night-only wear does not correct Class II, because the mechanics depend on continuous force delivery rather than intermittent bursts.
Patients should be given a full month of elastics at delivery and told to change them daily, or twice daily if they are heavy chewers. An elastic that has been worn for three days is delivering a fraction of its rated force and the patient has no way of knowing that.
The Side Effects Are Not Optional — They Are Physics
Every Class II elastic produces four effects at once, and only one of them is the one you wanted. The intended effect is sagittal: upper arch distal, lower arch mesial. The three you inherit are extrusion of the maxillary canine, extrusion of the mandibular molar, and a resulting counterclockwise rotation of the occlusal plane along with a downward and backward rotation of the mandible.
In a low-angle, deep-bite division 2 patient, that vertical side effect is genuinely useful and helps open the bite. In a high-angle patient with a long lower face or an existing open bite tendency, it is the thing that ruins the case. The mandible rotates open, the chin goes down and back, and the profile the patient came in to improve gets worse. High-angle Class II patients need their vertical control designed before elastics are prescribed, not after.
Elastics Unseat Aligners
This is the specific failure mode that distinguishes elastics on aligners from elastics on brackets. The elastic force pulls on the tray, and if the tray's retention in that segment is inadequate, the aligner lifts away from the teeth. The result is a case that stops tracking in the anterior segment while the clinician is looking at the posterior mechanics. Retention attachments on the canines and premolars, appropriate aligner material stiffness, and choosing buttons over precision cuts for heavy or long-duration elastics are the practical counters. Material behaviour matters here too — our comparison of multi-layer versus single-layer aligner sheets covers how sheet construction affects force retention and tray fit under load.
Elastic compliance is a behavioural problem as much as a clinical one, and it responds to the same tools that drive aligner wear generally. Our guide on patient compliance in clear aligner treatment covers the wear-time conversations, tracking approaches and check-in cadence that keep Class II cases on schedule.
Not Sure How to Stage Your Next Class II Case?
Our treatment planning team builds Class II setups with distalization sequencing, anchorage design, elastic vectors and precision cut placement defined — ready for your review and approval.
[email protected]Precision Cuts, Buttons and Attachment Design
An elastic needs something to hook to. In aligner therapy you have two options, and choosing between them is a real clinical decision rather than an administrative one.
Precision Cuts
Precision cuts clear aligners use are hooks or slots trimmed into the aligner itself during manufacture, most often at the maxillary canine and the mandibular first or second molar. Nothing is bonded to the tooth. They are faster to deliver, more comfortable, invisible in the way patients care about, and they eliminate the chairside time and debonding failures that come with buttons.
Their weakness is mechanical. The elastic force is applied to plastic rather than to enamel, which means the force is transmitted to the tooth only as long as the tray stays seated. Under heavy or prolonged elastic wear, particularly in the anterior segment, precision cuts are the mechanism by which aligners get pulled off teeth.
Bonded Buttons
Buttons bonded directly to the tooth, with the aligner cut back or relieved around them, transfer force to the tooth rather than to the tray. They are the correct choice for heavy elastic forces, for long-duration Class II correction, for cases where tracking has already been an issue, and for patients whose trays have shown anterior lift. The cost is chairside bonding time, patient comfort, aesthetics, and the occasional debond.
| Factor | Precision Cuts | Bonded Buttons |
|---|---|---|
| Force transfer | Via the aligner | Directly to the tooth |
| Unseating risk | Moderate to high under load | Low |
| Chairside time | None — built into the tray | Bonding appointment required |
| Aesthetics | Excellent | Visible, particularly on canines |
| Best used for | Light–moderate elastics, short duration, finishing | Heavy elastics, long duration, tracking-critical cases |
| Failure mode | Cut tears; tray lifts | Debond |
Placement Rules That Actually Matter
Precision cut position should be specified by tooth in the prescription rather than left to a default. The maxillary hook is normally on the canine, positioned toward the distal to improve the force vector, and the mandibular hook on the first or second molar depending on how much vertical component you want. A hook placed too far mesially on the lower arch shortens the elastic and steepens its vertical vector, increasing extrusion.
Retention attachments are not the same as elastic hooks and both have to be planned. Rectangular attachments on the premolars and canines resist the vertical pull of the elastic and keep the tray seated. Attachments serving the distalization mechanics themselves — usually optimised or horizontal rectangular attachments on the molars being moved — are a separate specification again. The full logic of attachment geometry and its interaction with staging is covered in our article on attachments, IPR and staging.
- Default to precision cuts for light, short-duration elastics: Comfort and compliance are genuine clinical variables.
- Switch to buttons when force or duration is high: Heavy Class II correction over many months belongs on bonded attachments.
- Specify hook position by tooth: Distal-canine and molar placement change the vector meaningfully.
- Plan retention attachments separately: Elastic hooks do not keep the tray seated; attachments do.
- Re-evaluate at the first sign of anterior lift: Tray unseating is a design failure, not a compliance failure.
Mandibular Advancement Features: Candidacy, Design and Sequencing
Mandibular advancement clear aligners incorporate wings or blocks on the posterior aligner surfaces that engage as the patient closes, holding the mandible in a forward posture. Functionally they behave like a fixed functional appliance built into the tray, with the significant advantage that alignment continues at the same time rather than waiting for the functional phase to finish.
Who It Works For
The candidate is a growing patient, ideally at or approaching the pubertal growth peak, with a Class II division 1 pattern driven by mandibular retrusion rather than maxillary excess. A well-defined chin, a reasonable lower facial height, and a patient who can tolerate the postural adaptation all improve the outcome. Compliance requirements are the same 20 to 22 hours, but the appliance works whenever the trays are in, without the patient needing to hook anything up, which is a meaningful practical advantage over elastics in the adolescent population.
Who It Does Not Work For
In adults, the same feature produces predominantly dentoalveolar change: the lower incisors procline, the upper incisors retrocline, and the molar relationship improves without the jaw relationship changing much. That is a legitimate outcome if it is the outcome you planned, and a disappointing one if you told the patient their jaw would come forward. Patients with active TMD symptoms, significant joint pathology, or restricted opening need careful assessment before being asked to posture forward for a year. And a maxillary-excess Class II is not an advancement case at all.
Design and Sequencing Decisions
Advancement is generally staged after an initial alignment phase, because wings engaging on a crowded or rotated arch produce unpredictable contact. In division 2 cases the sequence is stricter still: the deep bite has to be addressed and the retroclined upper incisors uprighted before the mandible can be postured forward without interference. Advancement in a locked division 2 bite simply does not work.
Advancement is usually delivered in increments rather than in a single jump, allowing the musculature and the joint to adapt. Patients should be warned about two to three weeks of adaptation, some initial difficulty finding a comfortable bite, and transient masticatory muscle soreness. A patient who was not warned will interpret all of this as the appliance being wrong.
Sequential Distalization: Staging, Anchorage and Where It Stops
Molar distalization with clear aligners is delivered sequentially: the second molar moves first while every other tooth acts as anchorage, then the first molar follows, then the second premolar, then the first premolar, and finally the anterior segment retracts into the space that has been opened. This one-tooth-at-a-time approach is the mechanic aligners are genuinely well suited to, because a wire cannot easily hold twelve teeth still while moving one.
The Staging Ratio
The efficiency of sequential distalization depends on the proportion of teeth moving at any given moment. A widely used working rule is that no more than about a quarter to a third of the arch should be active at once, with the remainder held as anchorage. Setups that violate this — typically by moving both molars and both premolars simultaneously to shorten the case — produce anchorage loss expressed as anterior proclination, and the space that appears distally is paid for by flaring at the front.
Distal movement should also be staged conservatively in millimetres. Where alignment might be staged at 0.25 mm per aligner, distalization is generally staged nearer 0.20 to 0.25 mm with extended wear on the active stages, because molar translation against a full arch of anchorage is slow. Pushing the rate produces crown tipping with the root left behind, which reads as success on the crown-level render and fails at the occlusal check.
Anchorage: Where the Reciprocal Force Goes
Every distalizing force has an equal and opposite mesial force acting on the anterior anchorage unit. In an arch with adequate incisor inclination and a thick labial plate, a small amount of reciprocal proclination is acceptable and often planned. In a patient whose upper incisors are already proclined, or whose lower incisors are thin-biotype and near their labial limit, it is not, and skeletal anchorage becomes necessary.
Class II elastics are themselves an anchorage strategy, not just a correction strategy. Running elastics during distalization uses the lower arch to reinforce the upper anterior anchorage, which is why the two mechanics are usually prescribed together rather than in sequence. Temporary anchorage devices, typically placed in the infrazygomatic crest or the palate, provide absolute anchorage and are the standard answer when distalization demand exceeds roughly 3 to 4 mm.
Practical Limits
Third molars are the first constraint. Distalizing into an erupted or impacted third molar does not work, and extraction is normally required before the plan is viable. Beyond that, the working guide is 2 to 3 mm per side without skeletal anchorage, which resolves a half-cusp Class II comfortably and a full-cusp one when combined with elastics. Cortical bone density at the tuberosity, root proximity, and the patient's periodontal status all impose case-specific ceilings on top of that.
- Move a quarter to a third of the arch at a time: More than that and the anchorage unit becomes the moving unit.
- Stage slowly: Around 0.20 to 0.25 mm per aligner with extended wear on active stages.
- Assess third molars first: Distalization into an unerupted or impacted third molar will not express.
- Run elastics concurrently: They reinforce anterior anchorage while contributing to the sagittal correction.
- Cap the expectation at 2–3 mm per side: Beyond that, plan skeletal anchorage or change strategy.
- Check roots, not just crowns: A distalized crown with a stationary root is tipping, not correction.
Building the Digital Setup: A Class II Planning Workflow
A Class II setup is a series of declared decisions rather than a single instruction to finish Class I. Working through the following sequence before the plan is built produces setups that are reviewable, defensible and far more likely to express as designed.
- Declare the Strategy and the Source of the Millimetres State whether the case is distalization, advancement, extraction camouflage, or a combination, and write down where each millimetre of sagittal change is coming from: upper distalization, lower mesialisation, incisor inclination change, or growth. If you cannot state the split, the software has decided it for you.
- Set the Vertical Strategy Before the Sagittal One Establish whether the patient can absorb the extrusive and mandibular-rotating side effects of elastics, or whether vertical control has to be actively protected. In division 2 cases, plan the bite opening as a prerequisite phase rather than something running in parallel.
- Define the Anchorage Unit Explicitly Specify which teeth are moving and which are holding at every phase, verify the moving proportion stays within the staging ratio, and decide in advance how much reciprocal anterior proclination is acceptable. Where the answer is none, specify skeletal anchorage at the planning stage rather than adding it in refinement.
- Assign Auxiliaries to Jobs Specify precision cut or button position by tooth, elastic configuration and force, retention attachments, distalization attachments and any torque prescription on the incisors. Every auxiliary should exist to solve a stated problem, and every stage range over which it is active should be defined.
- Build In Overcorrection Plan the molar and canine relationship past Class I, typically by a quarter to half a cusp, and overcorrect the overjet. Class II is a high-relapse correction and part of the planned movement will not express. Overcorrection is the allowance for both, and it belongs in the setup rather than in a refinement.
- Review the Setup Frame by Frame Check root positions at the end of distalization, check for collisions as the arch sequences, confirm elastic geometry is achievable at multiple stages rather than only at stage one, and verify solid posterior intercuspation at the final frame. The last frame always looks good; the intermediate frames are where the problems live.
Setup quality is capped by scan quality, and Class II cases are particularly sensitive to bite registration error, because the entire sagittal measurement depends on how the arches are related in the digital model. Our reference on STL file requirements for treatment planning covers scan capture and bite registration standards, and the review process itself is set out in our checklist on how to read and approve a 3D setup.
If your practice submits Class II cases regularly, standardising how that information reaches the planning team is worth more than any individual case decision. Our doctor portal for aligner case management covers how structured submission, 3D setup approval and case tracking reduce the back-and-forth that slows complex cases down, and our custom ortho treatment planning service outlines what a planning brief should contain.
Case Limits, Compliance and Why Class II Corrections Relapse
Knowing when clear aligners are the right appliance for a Class II is as valuable as knowing how to plan one. Aligners handle dental Class II capably and skeletal Class II only cosmetically.
Where Aligners Alone Fall Short
Full-cusp Class II in a non-growing adult, where distalization would need to exceed 4 mm per side, sits beyond comfortable aligner range without extraction or skeletal anchorage. High-angle patients in whom elastic-driven mandibular rotation must be actively prevented need vertical control the tray cannot supply on its own. Severe skeletal discrepancy with a profile-driven complaint is an orthognathic conversation. Erupted or impacted third molars block distalization until they are addressed. And ankylosed teeth will not move at all, regardless of staging.
Compliance Is the Dominant Variable
Class II correction with aligners asks more of the patient than any other case type: 20 to 22 hours of tray wear plus 20 to 22 hours of elastic wear, sustained over many months, with an appliance that is easy to remove and easy to forget. A case that would succeed on a compliant patient will fail on a non-compliant one no matter how well it was planned, which is why candidacy assessment should include an honest read on the patient in front of you and not only the malocclusion. In adolescents, mandibular advancement features are often the more realistic choice precisely because they remove the daily elastic-hooking step.
Why Class II Comes Back
Class II relapse traces back to three causes, and often to all three at once. The correction was achieved by tipping and proclination rather than bodily movement, so the teeth upright and drift back once forces stop. Residual growth continued in a Class II direction after treatment finished, which is the specific risk in patients treated before their growth was complete. Or the occlusion was never properly interdigitated, leaving no cuspal interlock to hold the corrected relationship.
The counters are planned rather than improvised. Design for translation instead of tipping and check root position at review. Build overcorrection into the setup. Verify solid posterior intercuspation at the final stage rather than accepting a rendered Class I with no contacts. Retain full time before transitioning to long-term night wear, and consider a fixed lower retainer where anterior alignment was hard-won. Our complete retainer guide after clear aligner treatment covers the retention protocols in detail, and our guide on how to reduce clear aligner refinements covers the wider staging principles that keep a case tracking to its plan.
For clinicians building a broader case library, our companion guides on crossbite correction with clear aligners and correcting overbite with clear aligners cover the transverse and vertical problems that so often travel alongside a Class II, and our overview of digital treatment planning for clear aligners provides the workflow context that sits around this clinical detail.
Frequently Asked Questions
Can clear aligners correct a Class II malocclusion?
What are precision cuts on clear aligners?
How long do patients need to wear Class II elastics with clear aligners?
Do mandibular advancement clear aligners work in adults?
How much molar distalization can clear aligners achieve?
Should you use Class II elastics or a mandibular advancement feature?
Why do Class II corrections relapse after clear aligner treatment?
Worldwide

Send Us Your Next Class II Case
Upload the STL, cephalogram and photographs, tell us your strategy and growth assessment, and receive a fully staged digital setup with distalization sequencing, anchorage design and elastic planning built in.
[email protected]