
Why Attachment Bonding Deserves a Protocol
Attachments are small, but they carry a lot of the plan. Rotations, extrusions, root movement and anchorage all depend on the aligner gripping a composite shape that matches the digital design. If that shape is short, overfilled, porous or bonded slightly out of position, the aligner seats differently from the setup and the planned force system changes before the first tray is even worn.
For dentists, orthodontists and DSO clinical teams, attachment bonding is also one of the few aligner steps that happens entirely in your hands. The manufacturer designs the attachment and supplies the template; your team prepares the enamel, chooses the composite, loads and seats the template, cures and cleans up. Small differences between operators can show up later as poor tracking, broken attachments and refinements.
This guide walks through what the evidence says about templates, composites, bond strength, wear and removal, and turns it into a practical chairside protocol your whole team can follow.
- Composite viscosity matters most for accuracy. An in vitro study found composite choice affected attachment reproduction more than template rigidity, with a viscous paste and rigid template performing best.
- Flowable saves chair time. A split-mouth trial found flowable composite took about 6 seconds per attachment versus about 33 seconds for packable, with no significant difference in one-year survival.
- Wear builds over time. In a 96-week simulation, attachments lost roughly 14% to 27% of their volume depending on the material, with differences appearing only after the first few months.
- Restorations need different surface treatment. On provisional resin, air abrasion, laser and plasma treatment raised bond strength, while roughening with a bur did not.
- Removal can cost enamel. Polishers removed the least enamel in a 2025 study, while a white stone bur removed the most.
What Attachments Do and Why Accuracy Matters
An attachment gives the aligner an active surface to push against. Without it, the plastic has only the smooth, convex crown to work with, which is why rotations of rounded teeth, extrusions and root movements are so difficult with aligners alone. Our guide to attachments, IPR and staging explains how attachment type and position are chosen in the setup.
The bonded attachment needs to match that design closely. Three bonding errors cause most of the trouble:
- Incomplete attachments. Voids, bubbles or a short fill leave the active surface smaller than designed, so the aligner has less to engage.
- Excess composite (flash). Overflow around the attachment changes its shape, can stop the aligner seating fully and traps plaque at the margin.
- Positional error. If the template is not fully seated, the attachment can sit slightly higher, lower or rotated compared with the digital plan.
Each of these makes the aligner fit the tooth in a way the setup did not predict. When tracking problems appear early, poorly formed attachments are one of the first things worth checking. Our article on how to reduce clear aligner refinements covers other common causes.
What the Evidence Shows
Research on attachment bonding is mostly in vitro, with a small number of clinical studies. The findings are still useful for building a consistent protocol.
Scroll horizontally to see the full table →
| Study | Design | Key finding |
|---|---|---|
| Valeri et al., 2022 | In vitro, rigid vs soft template, viscous vs flowable composite | Viscous composite with a rigid template reproduced attachments most accurately; composite choice mattered more than template |
| Angle Orthodontist, 2021 | Split-mouth randomized trial, 52 patients analyzed | Flowable about 6 s per attachment vs packable about 33 s; one-year damage rate 14.8% vs 9.7%, not statistically different |
| Yildiz and Dedeoglu, 2025 | In vitro, four composite systems, 96-week aging simulation | Volume loss of about 14% to 27% at 96 weeks; similar shear bond strength across materials |
| Nguyen and Nguyen, 2025 | In vitro, seven removal tools on 70 premolars | White stone bur removed the most enamel; polishers removed the least |
Templates and composite viscosity
An in vitro study in the International Journal of Dentistry compared rigid and soft transfer templates combined with a viscous orthodontic adhesive paste or a flowable nanohybrid composite. The rigid template with viscous composite reproduced the attachments most accurately, and the soft template with flowable composite performed worst. The authors concluded that the composite’s rheology had a bigger effect on accuracy than template rigidity, and that viscous composite gave more uniform results with less variability. Errors stayed below 60 µm in all samples, and the authors noted that the clinical significance of differences at this scale is not known.
Chair time and survival
Flowable composites are popular because they are quick to load. A split-mouth randomized clinical study in the Angle Orthodontist compared a flowable and a packable composite from the same product family. Preparation took about 6 seconds per attachment with the flowable material versus about 33 seconds with the packable one. After one year, the attachment damage rate was 14.79% with flowable and 9.70% with packable, but the survival analysis found no significant effect of material, arch, tooth location or attachment type. The study was carried out at one center by one clinician, so results may differ in other settings.
Wear and volume loss over time
A 2025 in vitro study in Progress in Orthodontics bonded four composite systems to extracted teeth and simulated 96 weeks of thermal cycling and aligner insertion and removal. Volume loss at 96 weeks ranged from about 14% to 27%. The groups did not differ at 12 weeks; differences appeared later in treatment. A high-viscosity composite combination wore least but took the longest to place and produced the most overflow, while an injectable composite was fast to place but wore fastest after 48 weeks. Shear bond strength was similar across all groups and above the clinical threshold cited by the authors. The study notes that material support was provided by an aligner company, which is worth bearing in mind when reading its conclusions.
A Step-by-Step Chairside Bonding Protocol
The steps below are a general framework. Always follow the instructions for the specific adhesive and composite your practice uses.
- Check the template before the patient sits down.Confirm it is for the correct patient and arch, the attachment wells are complete and the template seats fully on the first aligner model or the teeth.
- Clean the enamel.Remove plaque and pellicle from the bonding sites with a non-fluoridated, oil-free prophylaxis paste or pumice, then rinse thoroughly.
- Isolate and keep it dry.Use cheek retractors and moisture control. Saliva contamination after etching is one of the most common causes of early debonds.
- Etch only the attachment site.Limit etchant to the area under the attachment, rinse and dry until the enamel has a frosted appearance. Etching beyond the margin encourages flash bonding to enamel.
- Apply a thin layer of adhesive.Air-thin it and cure according to the manufacturer’s instructions. A pooled adhesive layer can change attachment thickness.
- Load the template wells carefully.Fill each well completely without trapping air. With a viscous composite, condense it into the well; with a flowable, inject from the base of the well upward.
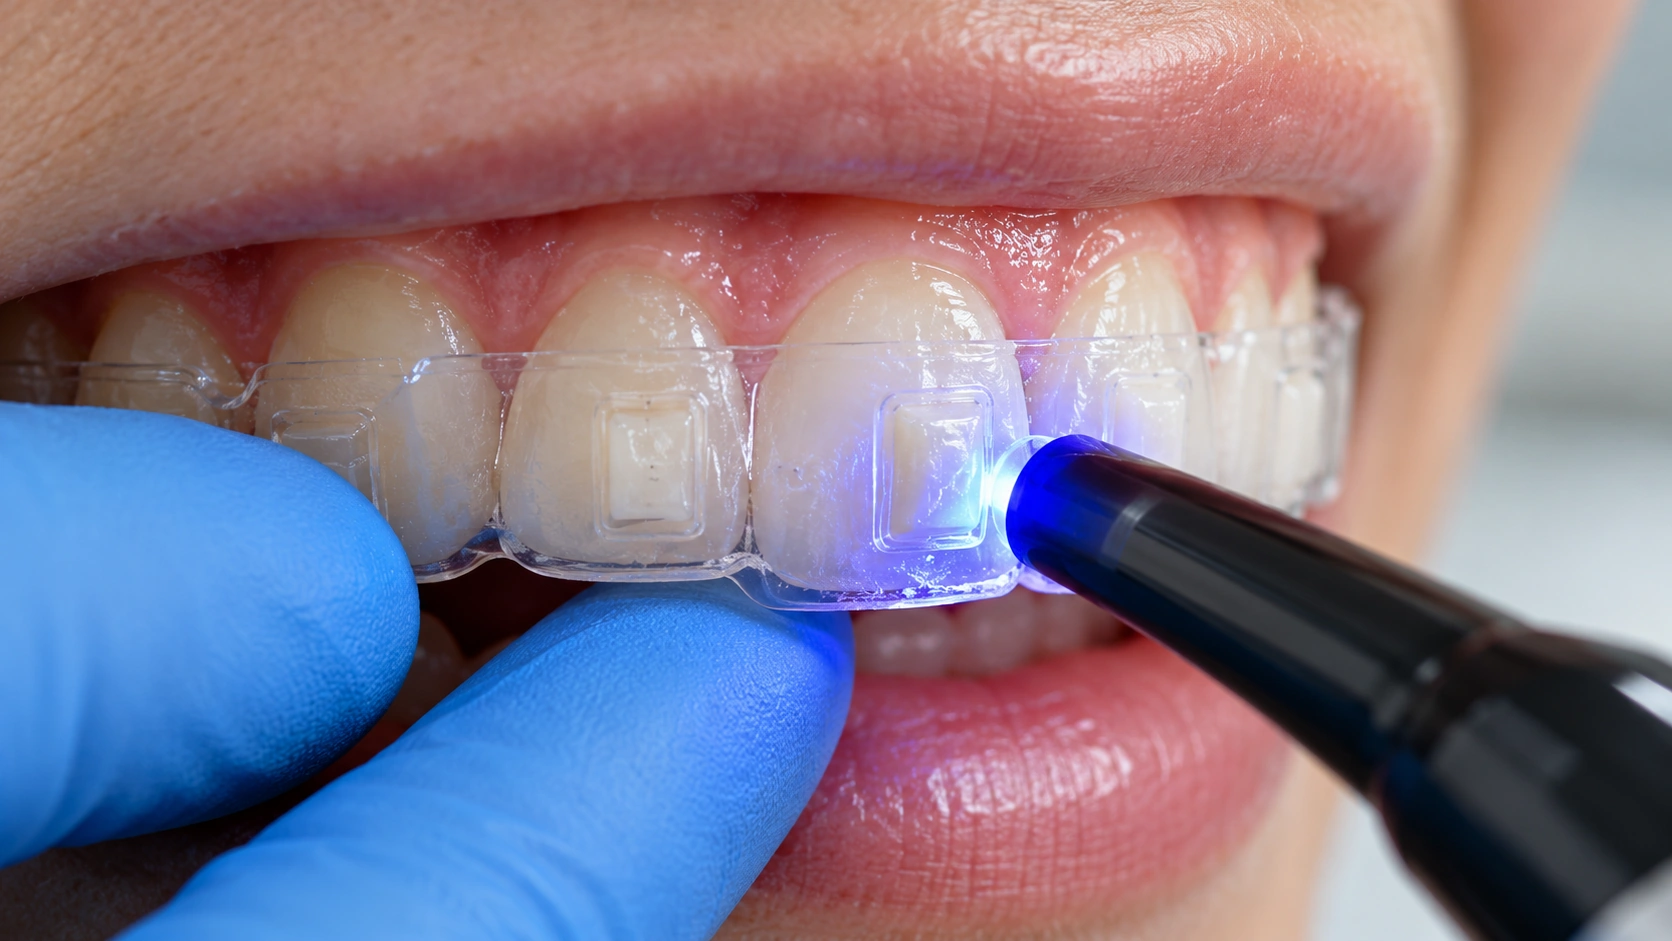
- Seat the template and hold it.Seat from anterior to posterior with firm, even pressure. Make sure it is fully home before curing, and keep pressure on during light curing.
- Cure each attachment properly.Cure through the template with the light tip close to the surface, then consider a second cure after removal for the margins.
- Remove the template and clean up flash.Peel the template off gently, then remove excess composite at the margins with a scaler or a fine finishing instrument without reshaping the active surface.
- Check every attachment and seat the first aligner.Compare each attachment with the plan, note any that are incomplete and confirm the first aligner seats fully.
Want attachments designed for easier bonding?
Our planning team can review attachment design, template choice and staging on your next aligner case.
[email protected]Bonding Attachments to Crowns and Restorations
Many adult aligner patients have crowns, veneers or provisional restorations on teeth that need attachments. These surfaces do not respond to enamel etching, so they need their own preparation.
A 2024 in vitro study in Frontiers in Oral Health tested attachments bonded to a bis-acrylic provisional material. Air abrasion with alumina, Er:YAG laser and non-thermal plasma treatment all raised shear bond strength significantly above the untreated control. Roughening with a diamond or carbide bur did not improve bond strength. After thermal aging, bond strength held up in the alumina-blasted and plasma groups, but fell in most others.
- Plan ahead. Flag crowns, veneers and large composite restorations in your case submission so the planner can decide whether an attachment is needed on that tooth.
- Use a surface-specific protocol. Ceramic, metal, composite and provisional materials each need their own conditioning and primer. Follow the restorative material and adhesive manufacturers’ guidance.
- Expect more repairs. Attachments on restorations are generally more likely to debond, so keep the template and plan for rebonding.
Our guide to approving a clear aligner setup covers how to review attachment placement before you sign off.
Troubleshooting Common Bonding Problems
Voids and bubbles
Usually caused by underfilled wells or air trapped as the composite is loaded. Fill from the base of the well, avoid stirring the material and check each well against the light before seating.
Flash and overflow
Usually caused by overfilling, etching beyond the attachment area or a template that rocks during seating. Excess composite can stop the aligner seating and alter the force system, so remove it carefully. The 2025 in vitro data showed that some high-viscosity systems produced more overflow than others, so technique matters as much as material.
Early debonds
Usually caused by contamination, inadequate curing or bonding to restorations without the right surface treatment. If several attachments fail in the first weeks, review isolation and curing before simply rebonding.
Worn or chipped attachments
Wear is expected over long treatments. Check attachment shape at each visit or rescan, and replace attachments that no longer engage the aligner, using the original template or a replacement template from the manufacturer.
Removing Attachments Without Damaging Enamel
Attachment removal at the end of treatment carries a real risk of enamel loss. A 2025 study in PeerJ compared seven one-step removal tools on 70 extracted premolars. A white stone bur used at high speed removed the most enamel, about 0.115 mm, and left the roughest surface. A tungsten carbide bur removed about 0.042 mm. The polishing instruments and disc removed roughly 0.010 to 0.027 mm, with no significant difference between them, and two silicone-based polishers gave the best balance of speed, enamel preservation and smoothness.
- Avoid aggressive stones for attachment removal.
- Use magnification and good light to see the composite-enamel boundary.
- Finish and polish the surface, then check for composite remnants before the retainer scan.
This study was in vitro and did not test aged composite, so treat the numbers as a guide to relative risk rather than exact clinical values.
Building a Consistent Protocol Across a Practice or DSO
When several clinicians and assistants bond attachments, the main risk is variation. A short written protocol and some simple checks can make results more predictable:
- Standardize materials. Choose one adhesive and one or two composites for attachments, and decide when each is used, for example by expected treatment length.
- Train and audit. Train assistants on loading and seating, and photograph attachments after bonding so the treating clinician can review them.
- Track failures. Record debonds and rebonds by operator and tooth. Patterns usually point to a technique issue rather than a material issue.
- Plan the template supply. Make sure replacement templates are available for rebonding, especially in longer cases.
Group practices can find more on standardizing aligner workflows in our guide to clear aligners for DSOs.
Limits of the Evidence
Most studies on attachment bonding are in vitro, with small samples, a single operator and only a few specific materials. They do not fully reproduce saliva, chewing forces, patient compliance or the many different attachment shapes used in practice. Clinical trials are few and are often run at a single center. Use the evidence to understand the trade-offs between accuracy, chair time and durability, and then build and audit a protocol that works for your team.
How Clear Moves Aligners Supports Attachment Planning
Clear Moves Aligners works with dentists, orthodontists, clinics, DSOs, dental labs and aligner brands as a clear aligner manufacturer and treatment planning partner. Our planners choose attachment shape and position as part of each setup and explain why each attachment is there, so the treating clinician can decide whether it is needed before approval. We can also flag teeth with restorations so your team can prepare the right bonding protocol.
If you want an outside team to design attachments and plan complex cases, our aligner treatment planning service works alongside your clinicians, and the treating doctor keeps final approval.
Have a case with tricky attachment placement? Talk to our team about case review, treatment planning support or a white label partnership.
Frequently Asked Questions
Should I use flowable or packable composite for aligner attachments?
Does a rigid or soft template give more accurate attachments?
Why do aligner attachments debond early?
How much do attachments wear during treatment?
How should attachments be bonded to crowns or provisional restorations?
What is the safest way to remove attachments at the end of treatment?
How can a DSO standardize attachment bonding across clinics?
Worldwide